The Escalation Policy determines how an escalation is being handled. The policy either notifies a user about an alert or creates a ticket, or both.
To configure an Alert Escalation policy:
- Click Escalation Policies on the Discovery and Monitoring page.
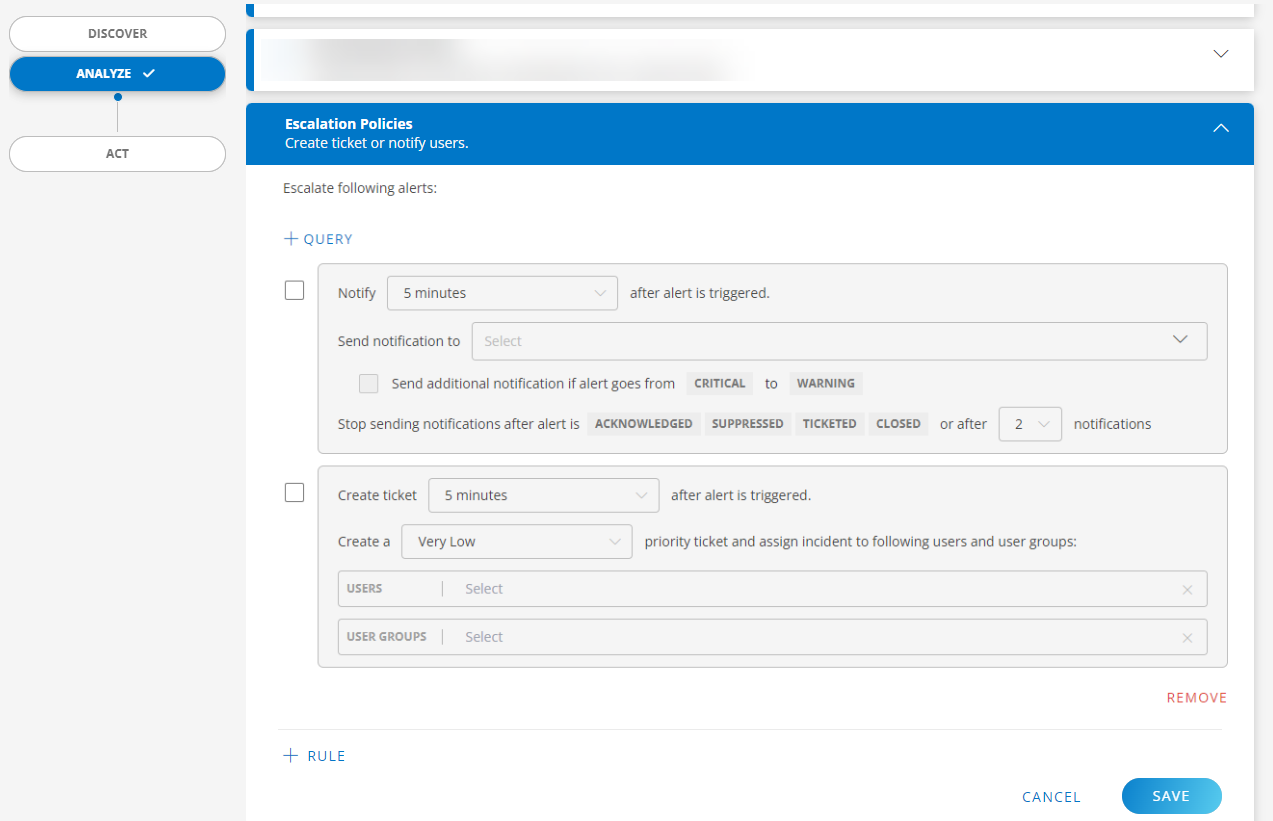
You can include only the alerts that match the filter criteria. To do this, click +QUERY and enter the OpsQL query.
For more information on how to query using OpsQL, click hereThe Notify check box is selected by default. If you do not want to use the notification option, clear the check box.
Configure the time interval for notification after an alert is generated. The default time interval is “5 minutes”. You can select “immediately” to notify as soon as an alert is generated. The maximum time interval is 15 minutes.
Configure the notification priority. The default priority is “VeryLow”.
The notification is sent to the user(s) in the roster. Select the roster(s) from the drop-down list.
Click here to learn how to create a roster.The Send additional notification if alert goes from CRITICAL to WARNING check box is selected by default. If you do not want to send additional notification, clear the check box.
The notification is stopped after the alert is ACKNOWLEDGED, SUPPRESSED, TICKETED, or CLOSED. You can also set the notification frequency after which the notification is stopped. The default is 2 and maximum is 10.
Select the Create ticket check box to create a ticket.
Configure the time interval for creating a ticket after an alert is triggered.
Configure the ticket priority. The default priority is “Very Low”. The incident is assigned to the selected users and user groups. Click here to learn how to create a user. Click here to learn how to create a user group.
Click REMOVE to remove a rule.
Click +RULE to add a rule.
Click SAVE. The incident ticket is created.
Next step
- Go to Command Center > Alerts to view the alerts.