Follow these instructions to download and install a gateway OVA image on a VMware ESXi Server, using VMware vSphere client.
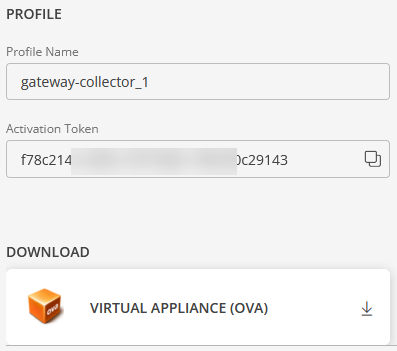
Download and deploy the gateway collector as a virtual machine on your hypervisor environment using the in-app download link.

Follow these steps to download the gateway:
Go to Setup > Collector Profiles
Click +ADD on the Gateway Collector Profiles page.
Enter a profile name and click the Virtual Appliance (OVA) tile.
Click NEXT.
Click the Virtual Appliance (OVA) tile. This downloads the OVA image OpsRampGateway.ova to your local computer.
Deploy a Gateway on the VMware ESXi Server
Follow these steps to deploy a Gateway on the VMware ESXi server using VMWare vSphere client with OVA Image:
Connect to the ESXi server.
Click File > Deploy OVF Template and then select Deploy OVF Template.
Click the Browse button and navigate to the source location, where you have downloaded the ova file.
Select the file and click Open.
Verify the details and click Next.
From the OVA Template Details screen, verify the OVA template details, and then click Next.
From the Name and Location screen, provide a unique name to the virtual machine and click Next.
From the Resource Pool screen, click on VG.
From the Storage screen, select the datastore for the virtual machine file and click Next.
From the Disk Format screen, select Thick Provision Lazy Zeroed and click Next.
From the Network Mapping screen, choose the network adaptor and click Next.
From the Ready to Complete screen, verify all the deployment settings you have chosen.
Click Finish. A popup appears that displays the OpsRamp gateway deployment progress.
When the deployment is completed successfully, you will see a confirmation message, “Completed Successfully”.
The ESXi server displays the OpsRamp Gateway virtual machine.
To power on the machine, right click on the gateway virtual machine and select Power > Power On.
Right click on the gateway virtual machine and select Open Console to access the gateway.
Log in to the gateway using the default credentials provided in the Activation tab, inside the gateway collector profile section.
Note:
We recommend you to set a unique hostname once the gateway is provisioned. This best practice ensures that you have a unique host name on the network.
Update the hostname
Use the following command to update the hostname:sudo opsramp-collector-start setup updatehostname <new hostname>Run the following command to change the default gateway collector password:
sudo passwd gateway-admin
Install Kubernetes
To run the gateway collector, you need to install the Kubernetes on the host.
Run the below command:
sudo opsramp-collector-start setup initClick here to proceed to the gateway registration section.