The Resource Overview pane allows you to view resources that are discovered through an integration.
The installed apps are displayed under categories in the pane.
The following basic steps let you view the Resource Overview pane:
Log in to OpsRamp.
Go to Infrastructure > Resources. The Home tab displays the Resource Overview pane.
All the installed apps are displayed under the categories.
For example: Public Cloud category will display the Apps: AWS, Azure, Google Cloud, Alibaba.
The OpsRamp Gateway is displayed under the Collectors category.
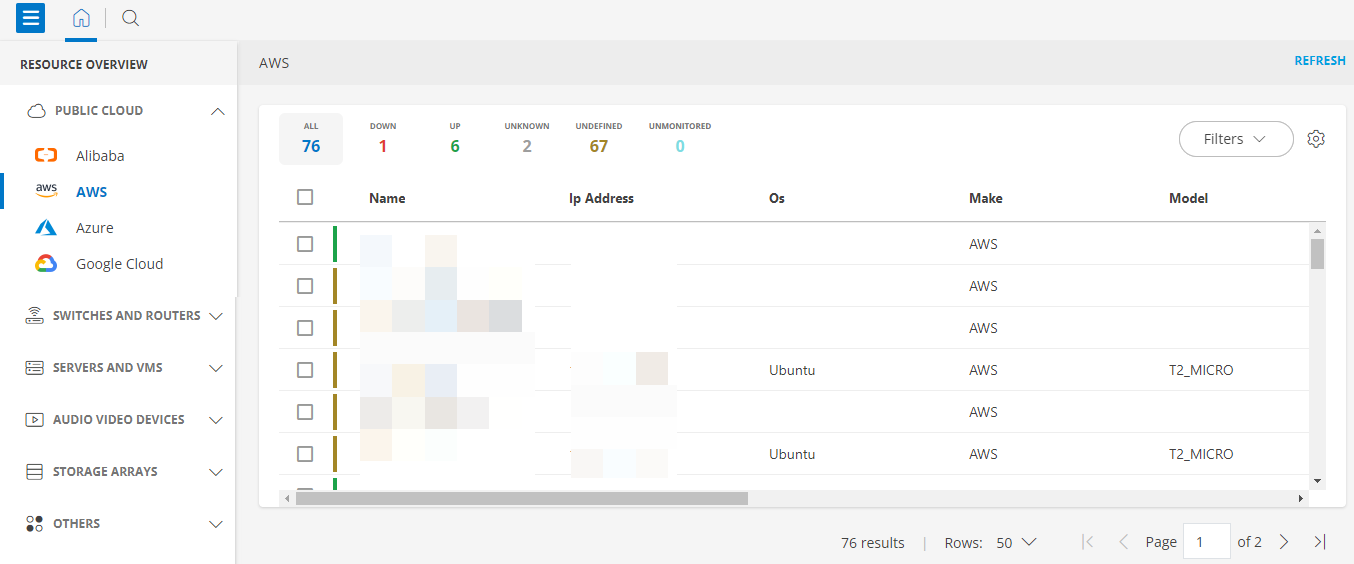
Click the App under the category to view the discovered resources.
You can view the availability state of the resources (UP, DOWN, UNKNOWN, UNDEFINED, ALL) along with the count. If you want to know the list of resources that are in a specific availability state, click the number.
Resources details like Name, Ip Address, Os, Make, Model, Native Type, State are also displayed on the page. By default, 12 columns are displayed.
Use the Filters option to filter and search for resources.
To filter:
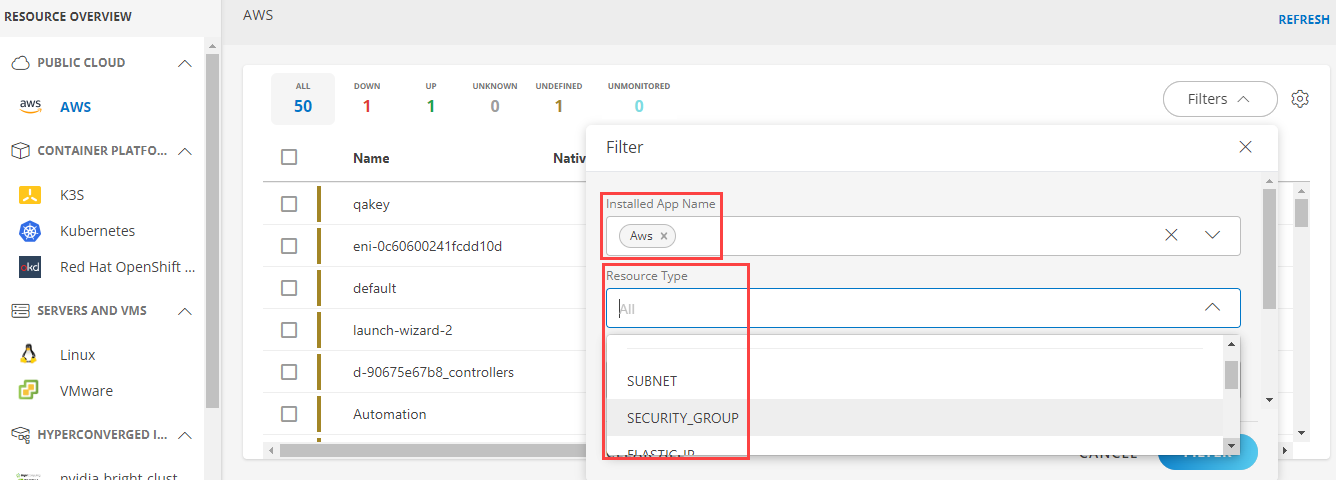
Click Filters and then select the required option. You can select the Installed App Name, resource type, Native Type, Operating System, and Make.
Click FILTER.
The following example shows the resources filtered using the Installed App Name as a filter criteria.
Based on the Installed App Name selected, the resource types that are discovered through that App are displayed in the Resource Type dropdown. Example: If ‘Aws’ is the Installed App name, then all the resource types that are discovered through Aws are displayed in the Resource Type dropdown.
Use the Settings gear icon to include/exclude columns that you want to show up on the page.
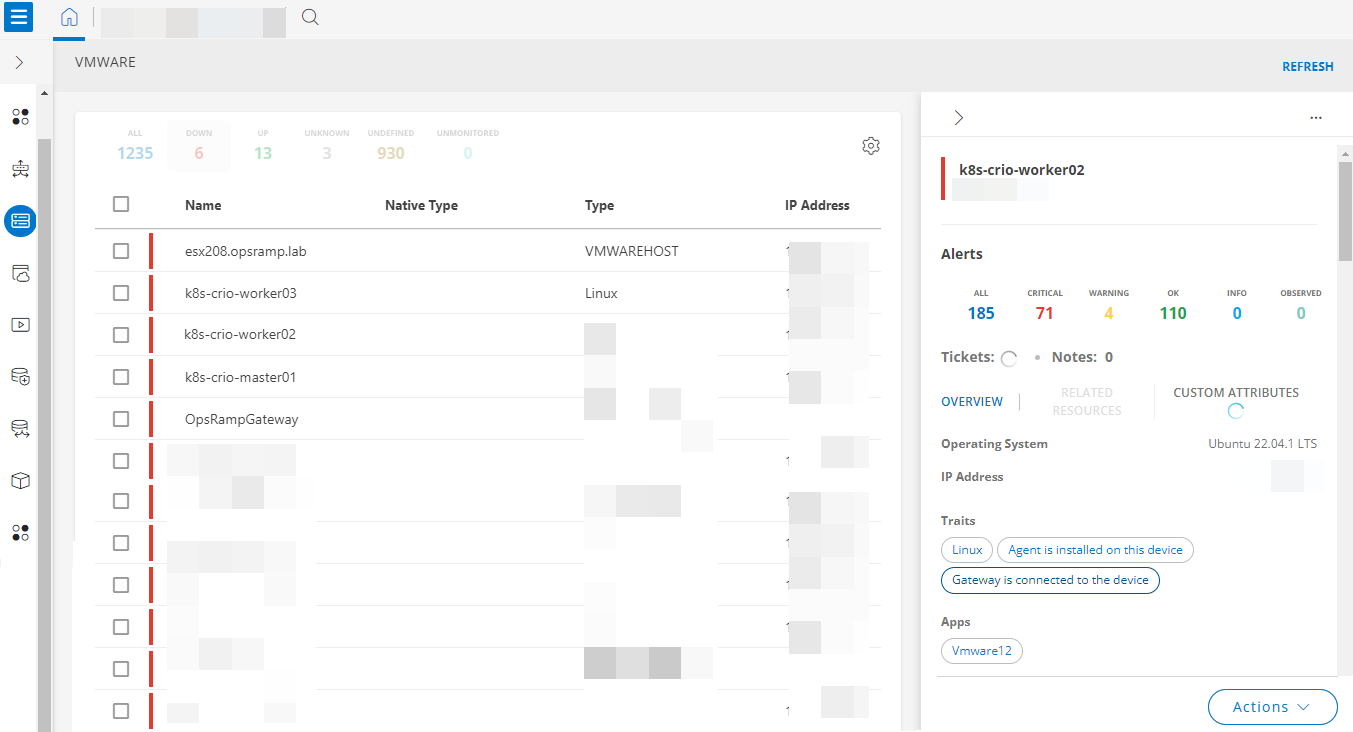
Click the resource name or anywhere in the row to view the resource details slide-out.
The slide-out has the following details:
Alerts: The number of alerts the resource has based on their current state: Critical, Warning, OK, INFO, OBSERVED, AND ALL (total number of alerts).
Tickets and Notes: The number of tickets on the resource and Notes (if any) are displayed.
OVERVIEW: The OVERVIEW tab is displayed by default. It has details like Make, Model, IP Address, OS, Resource Groups. Traits: Information related to the resource properties like gateway connectivity information, OS details, resource type.
RELATED RESOURCES: If the resource has a relationship with other resources, then the count of those resources, along with their native types, is displayed in the RELATED RESOURCES tab. Click the count to get the list of resources that are related to the resource. The tab is grayed out if there are no related resources.
See Related Resources for more information.
CUSTOM ATTRIBUTES: The custom attributes tab displays the attribute name, value and the Source.
ACTIONS: Use the ACTIONS button to:
Schedule maintenance period on the resource.
You can also select bulk resources and perform the above actions.
three dots menu: Click the three dots menu available at the upper-right corner of the slide-out. The View details and Customize monitors options are displayed.
Click Customize monitors, to view the Customize Monitors page.
Click View details to navigate to the resource details page. The Customize Monitors icon is available at the upper-right corner of the page. Click the icon to navigate to the Customize Monitors page.
You can modify the alerting thresholds, enable alerting for the metrics, and mark the metrics for availability computation on the Customize Monitors page.
Delete, Manage and Unmanage resources
Monitorable resources that have only agent installed and gateway discovered devices can be managed, deleted, or unmanaged. Remaining resources can only be deleted.
Note: A maximum of 40 resources/devices can be selected to perform the above actions.
Delete
To delete a resource:
Select the resource(s) you want to delete. The number of selected resources is shown.
From the Actions dropdown click Delete.
The Delete Resources dialog box shows the resource that are selected for deletion.
Click Delete to delete the resource(s). The resource(s) are deleted and a confirmation message appears.
Manage
You can manage a resource that is in an inactive or unmanaged state.
To manage a resource:
Select the resource(s) that are in the inactive state. The State column in the table shows the inactive resources.
From the Actions dropdown click Manage.
The Manage Resources dialog box shows the resources that are applicable for managing. It also shows the resources that are not applicable for managing. For example, if you select an active resource, it will be shown under the Non-Applicable section.
Click Manage to manage the resource(s). The resource(s) are managed and a confirmation message appears.
The state of the resource(s) changes to “Active”.
Unmanage
You can unmanage a resource that is in an active or managed state.
To unmanage a resource:
Select the resource(s) that are in the active state. The State column in the table shows the active resources.
From the Actions dropdown click Unmanage.
The Unmanage Resources dialog box shows the resources that are applicable for unmanaging. It also shows the resources that are not applicable for unmanaging. For example, if you select an inactive resource, it will be shown under the Non-Applicable section.
Click Unmanage to unmanage the resource(s). The resource(s) are unmanaged and a confirmation message appears.
The state of the resource(s) changes to “Inactive”.