A user is:
- A person who is assigned a role or any number of roles in an organization
- Has access permissions to the resources or assets of the organization
Creating a user is a two-step process:
- Add the information needed to invite the user
- User completes the registration process
Follow these steps to create a user:
Click Setup. The ACCOUNT DETAILS page is displayed.
Click the Users and Permissions tile on the ACCOUNT DETAILS page. The PERMISSION SETS page is displayed.
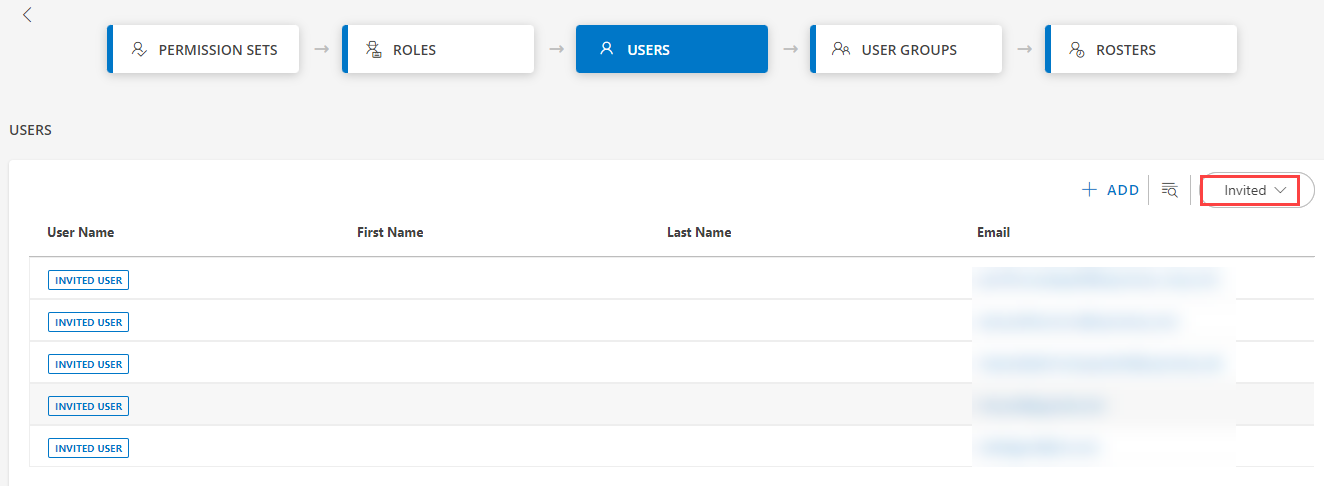
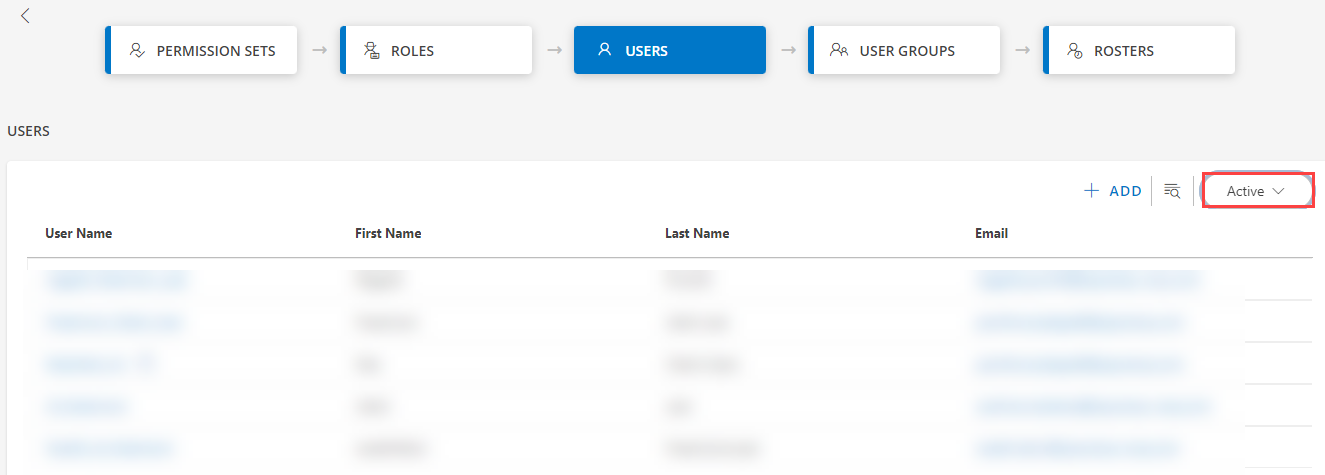
Click the USERS tile.
Click +ADD. The ADD USER page is displayed.
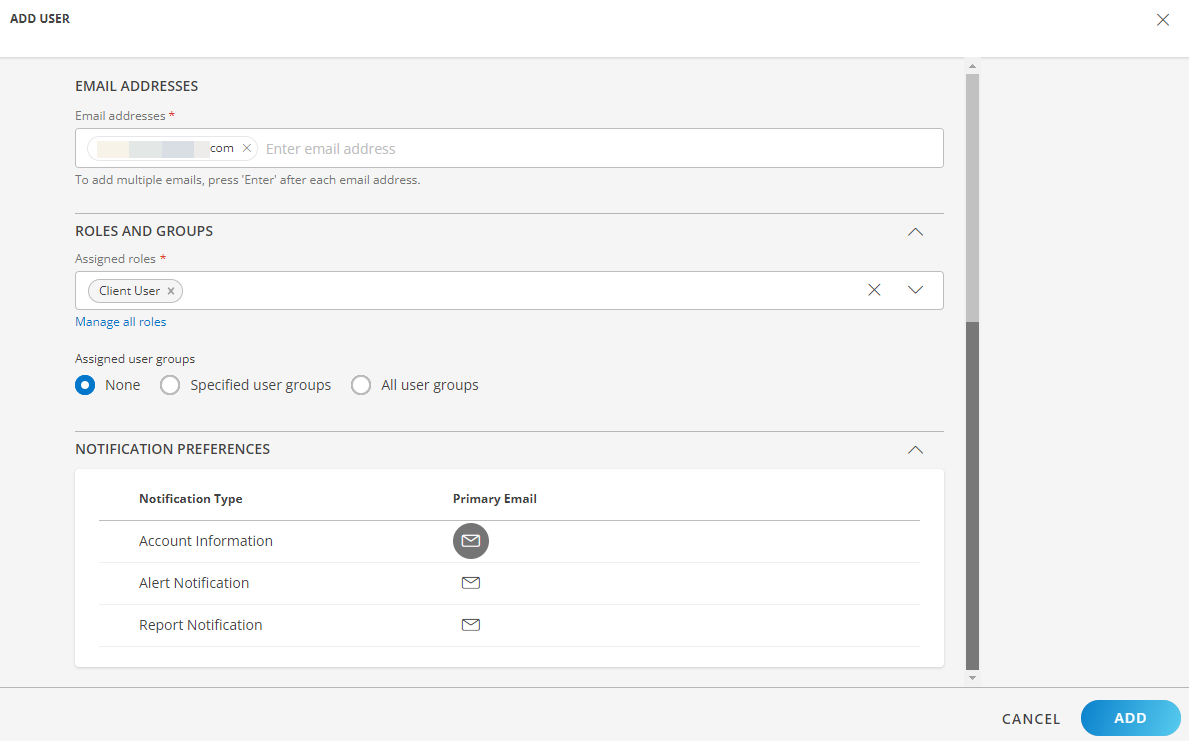
Provide the following information in the fields:
Email Addresses: Enter Email addresses. You can add multiple Email addresses. Press Enter to after each Email address.
Select roles from the Assigned Roles drop-down list, to assign the roles to the user. You can assign multiple roles.
Click the Manage all roles link, to add, view role details, or delete a role.
Note: You cannot delete a default role.
These are the default roles:- Client Administrator: The Client administrator role is the highest level, wherein a user with this role can access and control all organization’s data and resources.
- Client user: User with this role can only view data.
- Client Dashboard Default Share Role: User with this role can only view a shared dashboard.
From Assigned user groups, select one of the following to specify group membership for the user:
- None: If you do not want to assign the user to any user group.
- Specified user groups: Select a user group from the drop-down list.
Click the Manage all user groups link, to add, view user group details, or delete a user group. - All user groups: This option will make the user part of all user groups.
Notification Preferences: The Account Information notification through Primary Email is selected by default. Select the Alert Notification/Report Notification options as required.
Click ADD. The user details are added and the user is invited to register.
The user information is displayed in the Invited list.
Once the invited user completes the registration process, the user details are displayed in the Active list.
You can perform the following actions after creating a user:
| Action | Procedure/Description |
|---|---|
| Search | To search for a user, click the search icon on the user listing page. Type the user name in the search box. The search result is displayed. |
| View and Edit | To view user details, click the user name. To edit user information:
|
| Deactivate | Deactivating a user means disabling the user account, wherein a user account and its related data would be available on the system but users cannot use the account. The account can be activated later. To deactivate a user:
|
| Expired | Once the invite link expires, the user information appears in the Expired list. The user can be re-invited. |
| Invited | All the users who are invited appear in the Invited list. |
| Unlock | After three unsuccessful attempts to log in to OpsRamp, the user account is locked. Contact your Administrator to get the account unlocked. |
You can view the number of users on the Users and Permissions tile on the ACCOUNT DETAILS page.