- Roles define the access permissions of each user in your organization.
- Roles are sets of permissions and configurations that determine how a user interacts with the platform, as well as the functionality a user can access.
You can create multiple roles. The administrator role is the highest level that can access and control each resource. You can assign more than one role to a user or a user group.
Prerequisite
- Permission sets have been created and available.
Create a Role
To create a role:
Click Setup. The ACCOUNT DETAILS page is displayed.
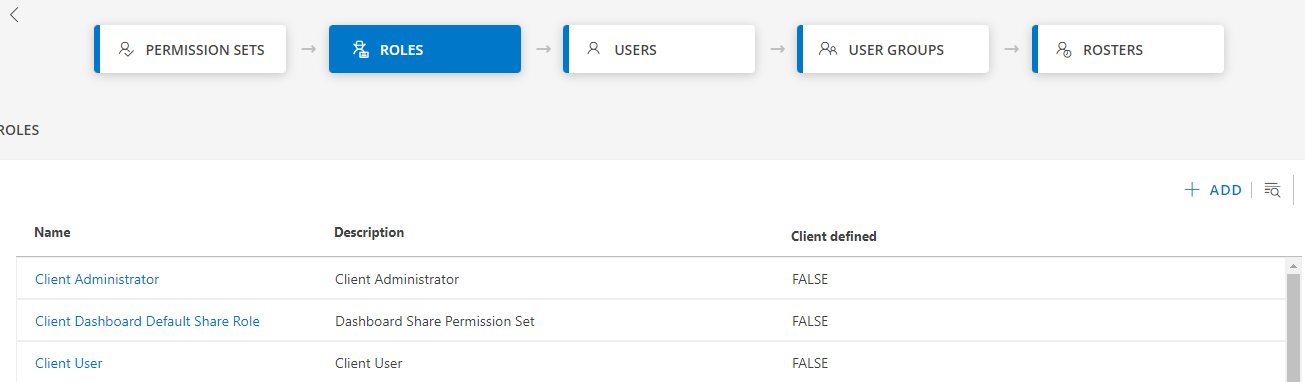
Click the Users and Permissions tile on the ACCOUNT DETAILS page. The PERMISSION SETS page is displayed.
Click the ROLES tile.
Click +ADD from the ROLES page. The ADD ROLE page is displayed.
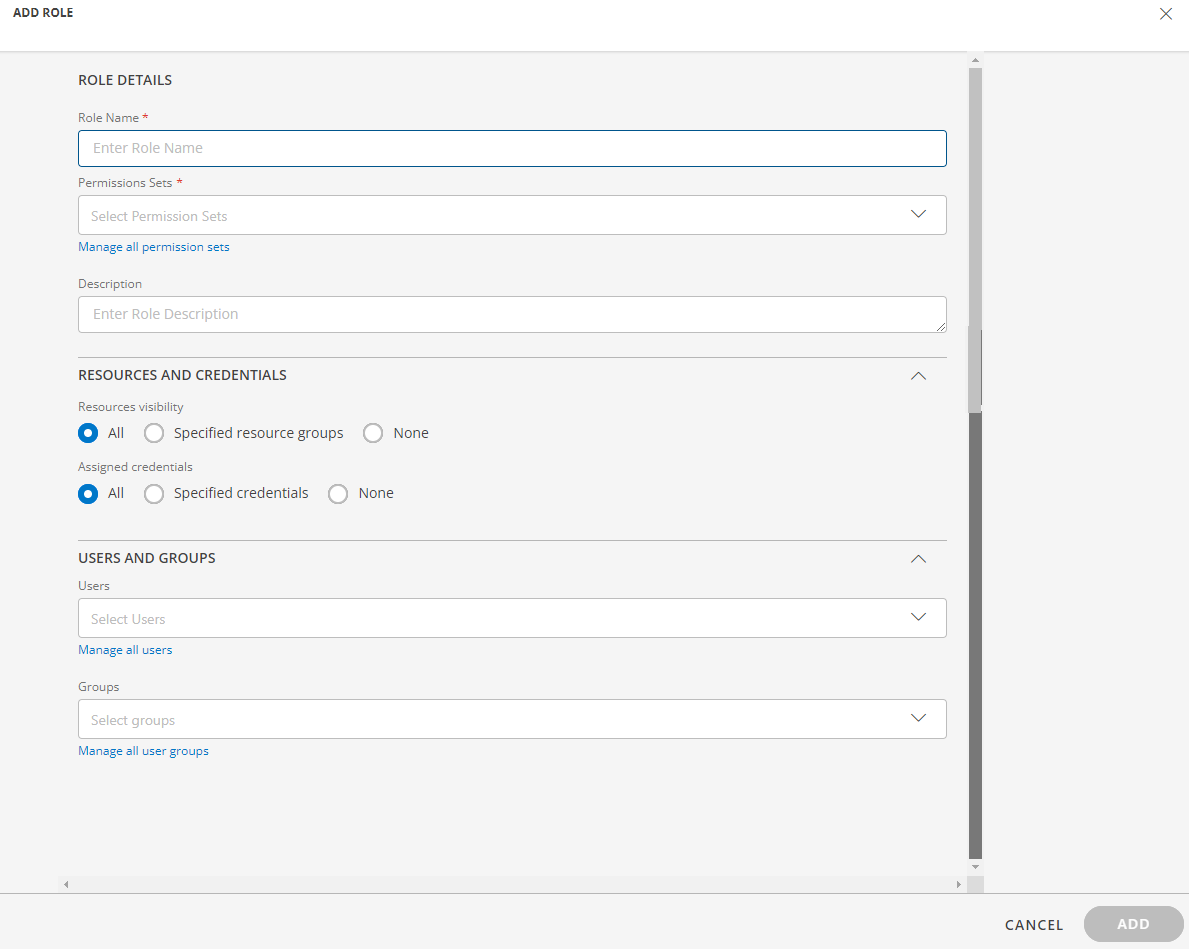
Enter the following information:
- Role Name: Name of the role.
- Permission Sets: Select the permission sets from the list.
Click Manage all permission sets to create a permission set.
Note: The Client Administrator, Client Dashboard Share Permission Set, and Client User are the default permission sets. - Description: Provide details to describe the role.
From Resources visibility, select one of the following three options to apply visibility of devices to the role you are creating:
- All: Lets a role have the visibility of all resources in the client.
- Specified resource groups: Lets a role have the visibility of only the selected resources in the client.
- Select a resource group(s) from the list.
- None: Prevents a role from having the visibility of the client resources.
From Assign credentials, select one of the following three options to apply visibility of credentials to the role you are creating:
- All: Lets a role have visibility of all credentials in the client.
- Specified credentials: Lets a role have visibility of only the selected credentials in the client.
- Select a credential(s) from the list.
- None: Prevents the role from having visibility of client credentials.
From Users, select a user(s) from the list.
Click Manage all users to create a user.From Groups, select a user group(s) from the list.
Click Manage all user groups to create a user group.Click ADD.
The role is created and displayed in the ROLES listing page.
You can perform the following actions after creating a role:
| Action | Procedure/Description |
|---|---|
| Search | To search for a role:
|
| View | To view a role:
|
| Edit | Note: You cannot edit a default role.
|
| Remove | Note: You cannot remove a default role.
|