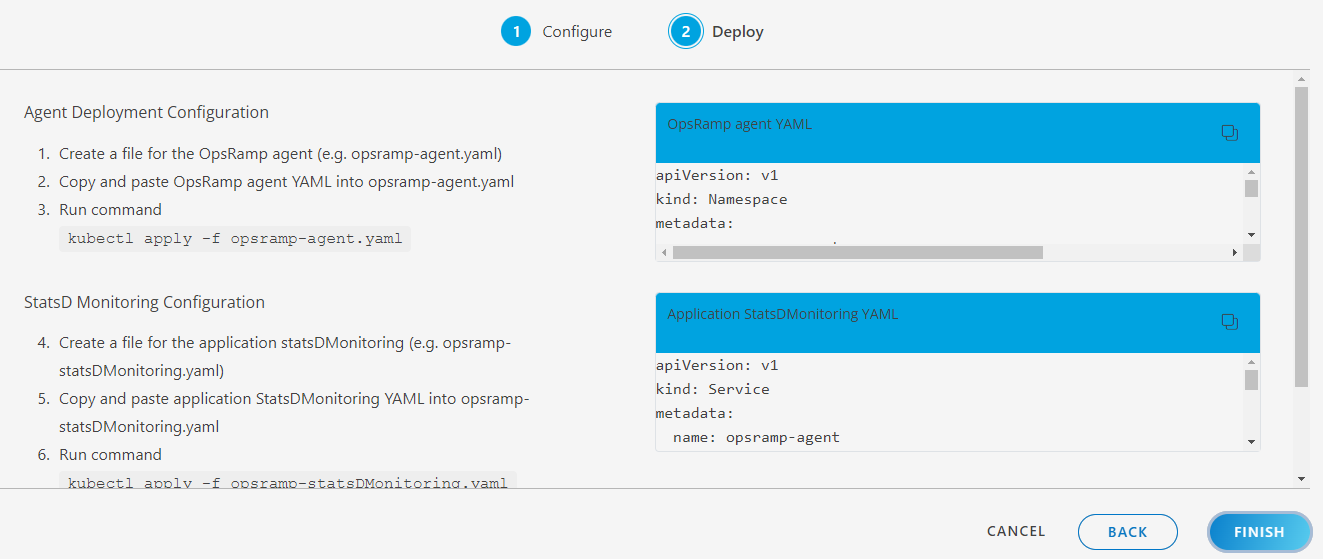
Connect to a cluster and create a custom namespace.
kubectl create ns {namespace-name}
For example-
kubectl create ns monitoring
Step 2: Install the integration
From All Clients, select a client.
Go to Setup > Integrations and Apps.
If there are apps/integrations already installed, it will redirect to the INSTALLED INTEGRATIONS page where all the installed integrations/apps are displayed. Click +ADD and search for Kubernetes on the AVAILABLE INTEGRATIONS AND APPS page. Also you can use the All Categories dropdown list to search.
If there are no installed apps, it will navigate to the AVAILABLE INTEGRATIONS AND APPS page.
Click +ADD on the Kubernetes tile.
Enter the following details:
Name: Name for the integration.
Deployment type: On-prem or Cloud (AWS, GKE, and AKS)
Container Engine: Docker or ContainerD. Primarily, Docker is used. ContainerD is used for K3s integration.
Click on NEXT.
Step 3: Configure the integration
Create a YAML file in the cluster. Example- agent.yaml
Paste the copied content from the portal into a new YAML file.
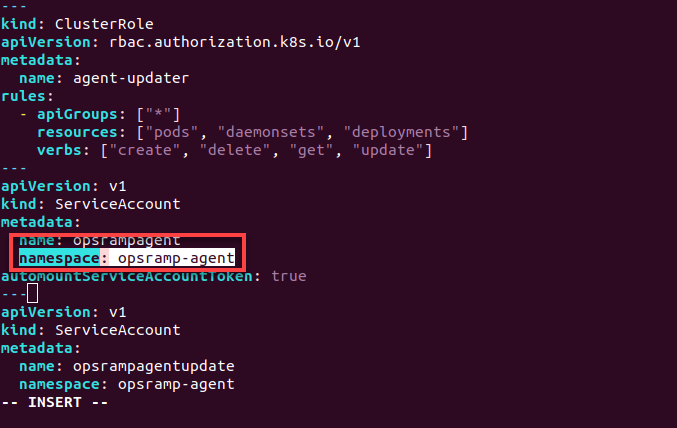
Now, replace the namespace: OpsRamp-agent to the created new namespace.
Remove the section for creating namespace in the OpsRamp Agent YAML.
Note: You must change the namespace to custom namespace (ex- monitoring) wherever namespace exists in the file and then save the file.Example: Follow the similar ways and change the namespace as given a example for ServiceAccount namespace below:
ServiceAccount
ClusterRoleBinding
DaemonSet
Deployment
ConfigMap in OpsRamp Agent YAML
Run the below command to apply the configuration:
kubectl apply -f agent.yaml
Now the agent is installed in your cluster.
To check the status of the agent installed in the namespace, run the command below.
kubectl get pods -n monitoring
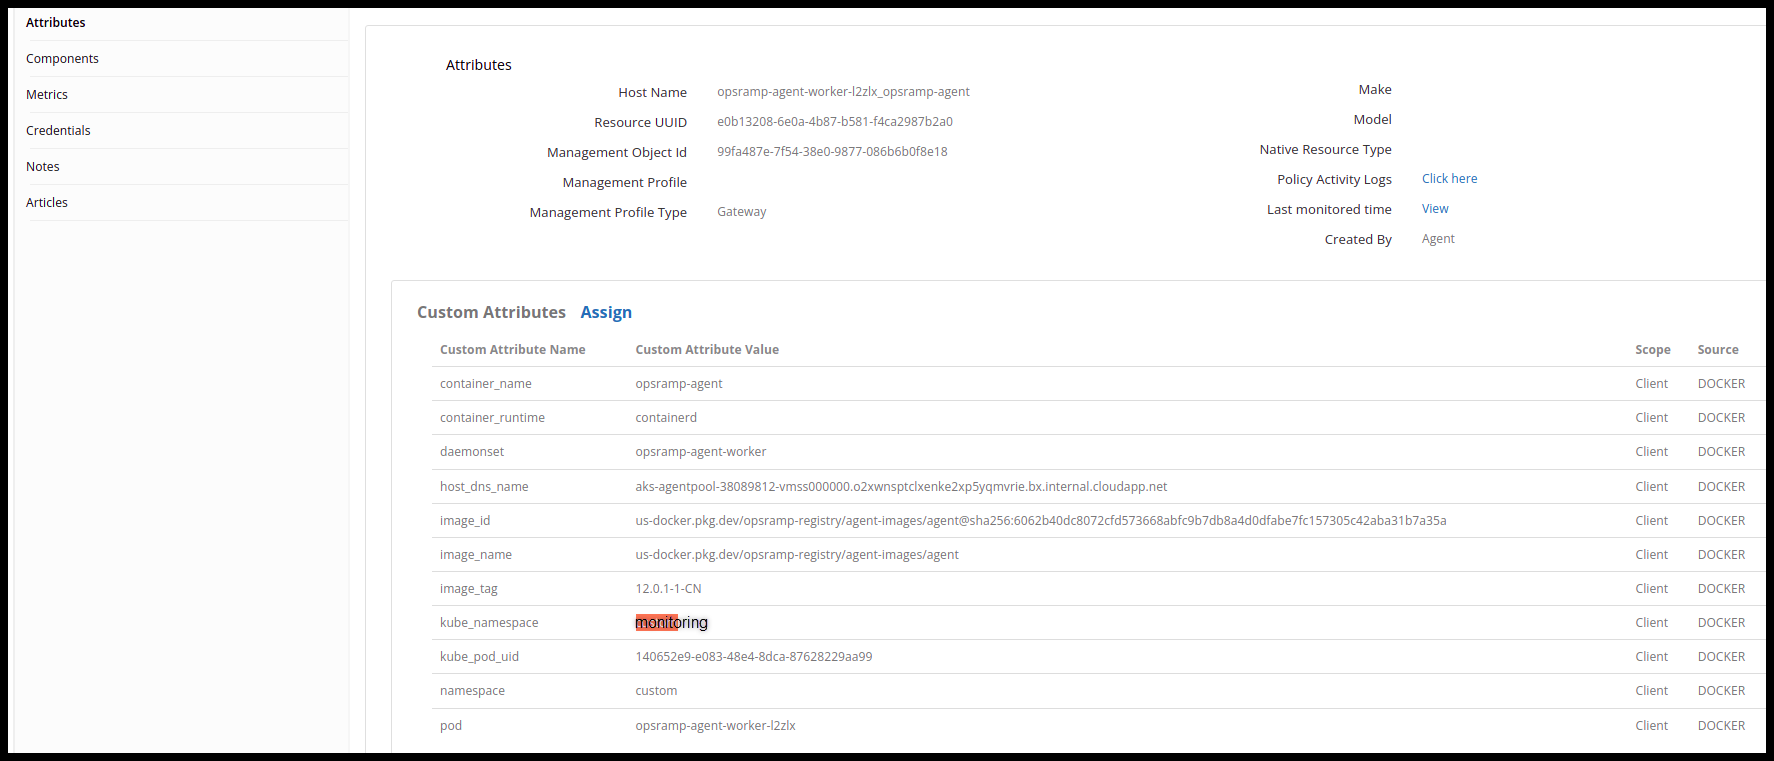
Step 4: Check the status of namespace in OpsRmap
Go to OpsRamp portal, click on Infrastructure > Resources.
In the lift side of the page, click on kubernetes to expand it.
Next, expand the nodes and then click on container.
Then, under Attributes, you can view the status of your newly created namespace.
OpsRamp Agent yaml
Default yaml we get from portal
Changes that to be done to install in a different namespace