Overview
The Secure Shell (SSH) monitor facilitates agentless discovery of SSH-enabled devices.
Linux flavors
The following Linux flavors are supported:
- Ubuntu
- Debian
- CentOS
- Fedora
- SUSE
- OpenSUSE
- Red Hat Enterprise Server
- Oracle Server
- Amazon Linux
Components discovered
The gateway discovers the following data:
- Basic device details such as OS, Mac, Make, Model and Serial No.
- BIOS information
- CPU processor information
- Physical disk drives
- Logical disk drives
- Network cards information
- Video cards information
- Services
- Installed applications
Pre-requisites
- Before starting the discovery process for SSH-enabled devices, provide valid credentials (SSH keys) and IP addresses of SSH-base machines.
- OpsRamp Gateway must be installed.
Agentless SSH Discovery
Agentless discovery uses a Linux gateway instead of an agent to discover SSH-enabled resources.
- Install the gateway.
- Create a discovery profile.
- Scan the devices.
Configure and Install a Linux Integration
Go to Setup > Integrations and Apps.
Click + ADD on the Installed Integrations page.
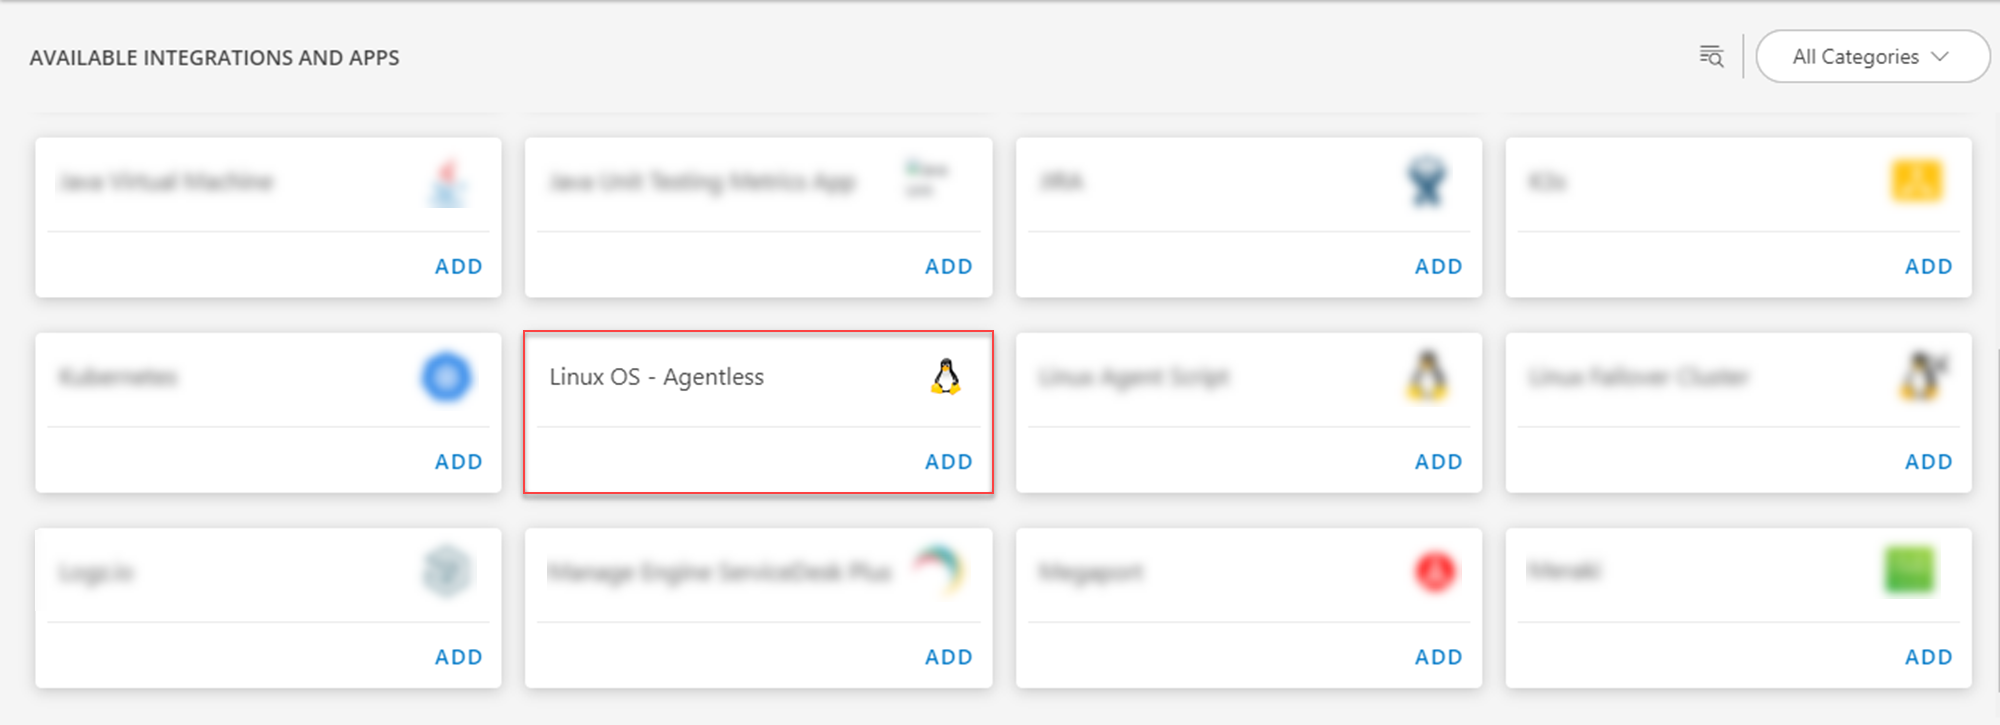
The Available Integrations and Apps page displays all the available applications.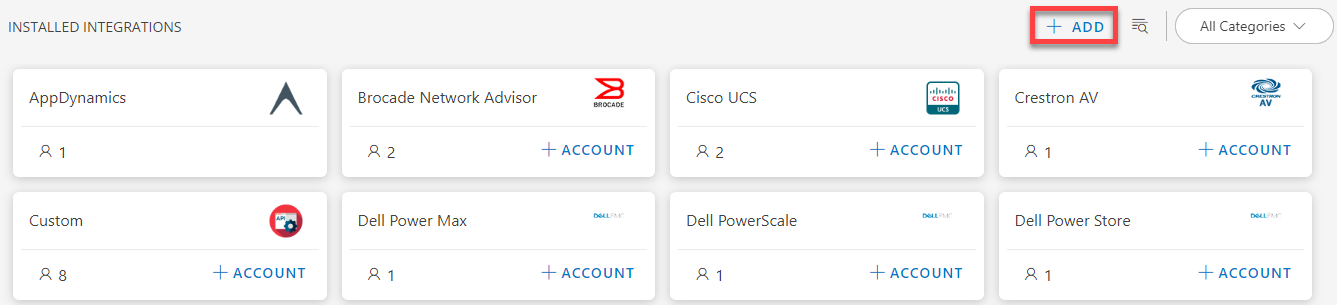
On the right side of the page, under All Categories, click Compute in the drop-down menu.
Note
You can also use the search option to look for the application. You can also search using the All Categories option.Click ADD in the Linux OS - Agentless application.
From the Configurations page, click + ADD.

The Add Configuration page appears.
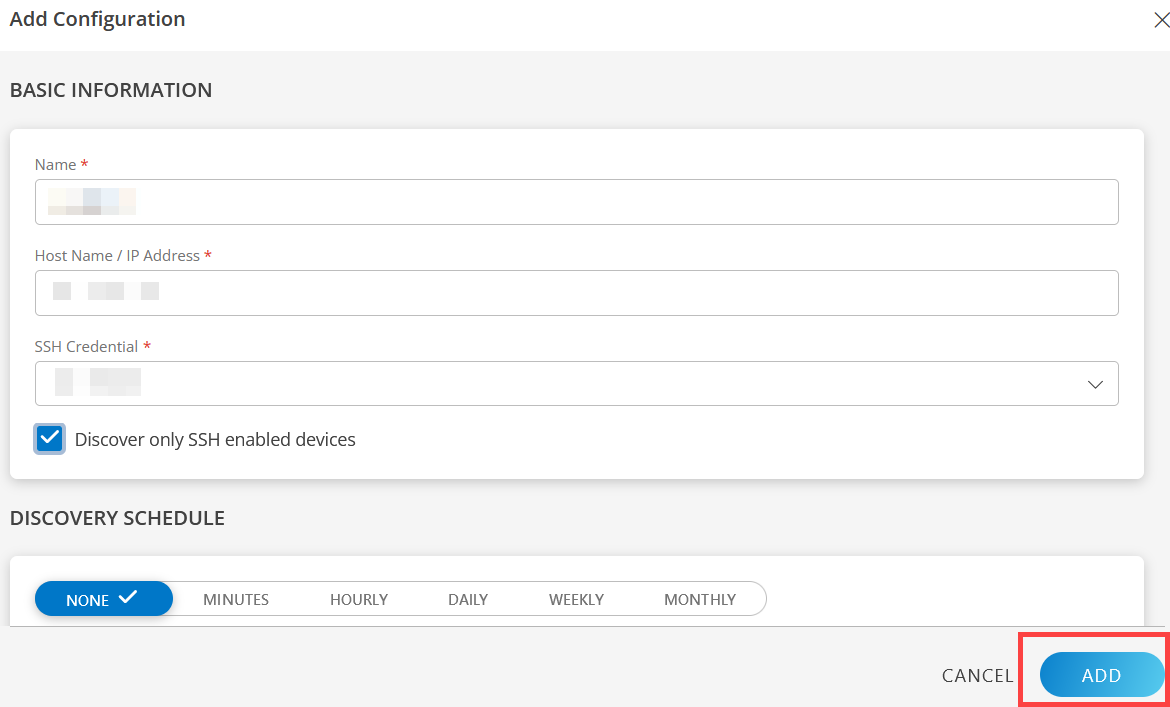
In the Add Configuration, enter the below details in the Basic Information section:
- Name: Enter the name for the integration.
- Host Name/IP Address: Host name or the IP address provided from the installation.
- SSH Credential: Select an existing credential or create a new credential.
- Click + ADD to create a new credential. In the ADD CREDENTIAL window that appears, enter the following information:
- Name - Enter the name.
- Description - Provide a description.
- Authentication Type - The Password or Keypair option is available.
For the password option, enter the username, password, and confirm password fields. For the keypair option, upload a file through the Upload via file option or provide a link through the Already has a link option. - User Name (mandatory) - Enter the username.
- Password - Enter the password. To ensure that you have typed the correct password, click the eye icon to view the password that you entered.
- Confirm Password - Reenter the password. To ensure that you have typed the correct password, click the eye icon to view the password that you entered.
- SSH Key Passphrase - Enter the passphrase. To ensure that you have typed the correct passphrase, click the eye icon to view the passphrase that you entered.
- Confirm SSH Key Passphrase - Reenter the passphrase. To ensure that you have typed the correct passphrase, click the eye icon to view the passphrase that you entered.
- Secure - Select the option based on your preference.
- Port - Enter the port number - 22.
- Connection Timeout(ms) - Enter a value.
Click ADD.
- Discover only SSH enabled devices: If you choose this option, only SSH enabled devices are discovered.
In the Discovery Schedule section, select Recurrence Pattern to add one of the following patterns:
- None: Select this option, If you don’t want to schedule the discovery.
- Minutes: Select this option, If you want to apply the discovery on a minute basis. You can configure this option by choosing: Every minute.
- Hourly: Select this option, If you want to apply the discovery on hourly basis. You can configure this option by choosing: Every hour.
- Daily: Select this option, If you want to apply the discovery daily. You can configure this option by choosing: Every Weekday (Mon-Friday) or Everyday.
- Weekly: Select this option, If you want to apply the discovery on a weekly basis. Configure weekly schedule by selecting: Time preference, Starting date, and Days.
- Monthly: Select this option if you only want to apply discovery on a monthly basis. Configure this by selecting: Time preference, Starting date, and number of days in a month.
Click ADD.
Now the integration is saved and displayed on the configurations page after you save it. From the same page, you are able to Edit and Remove the created configuration.
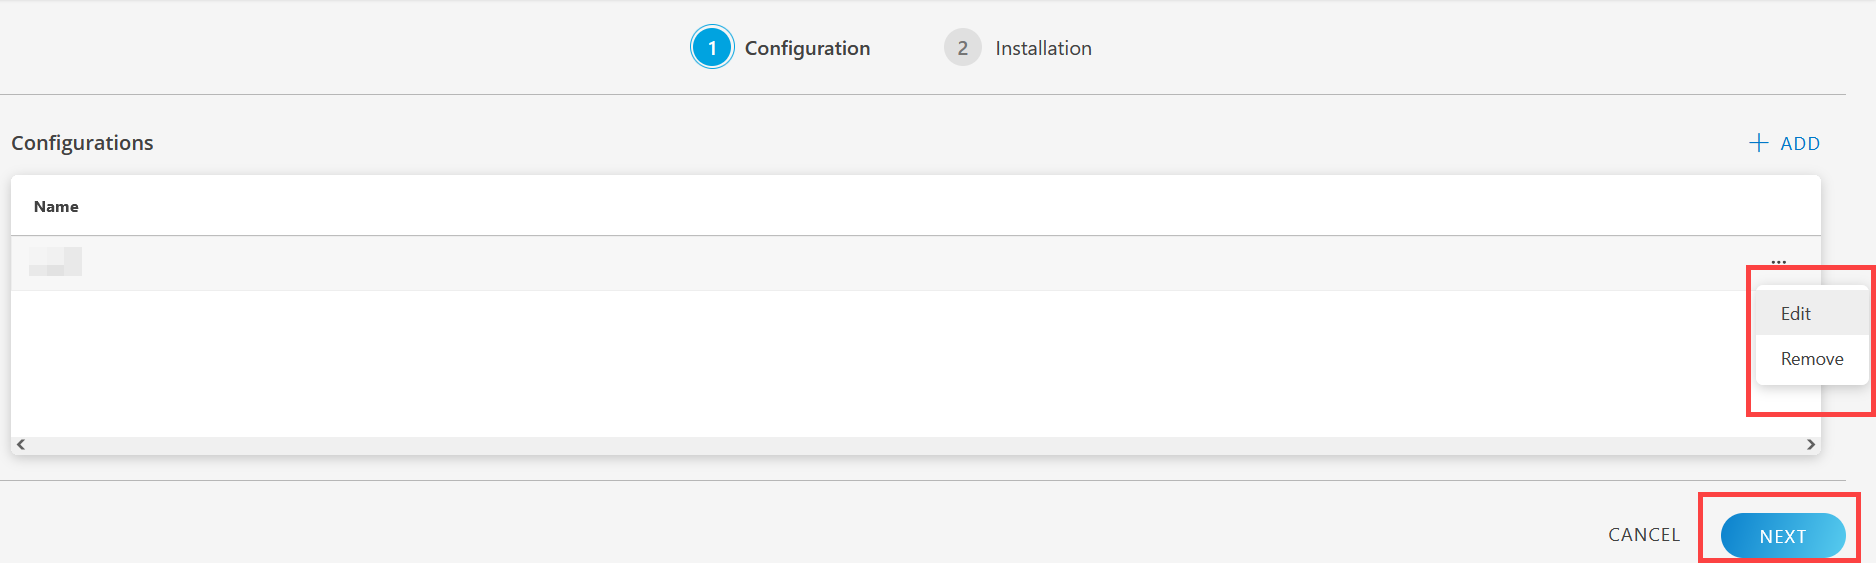
Click Next. The Installation page is displayed.
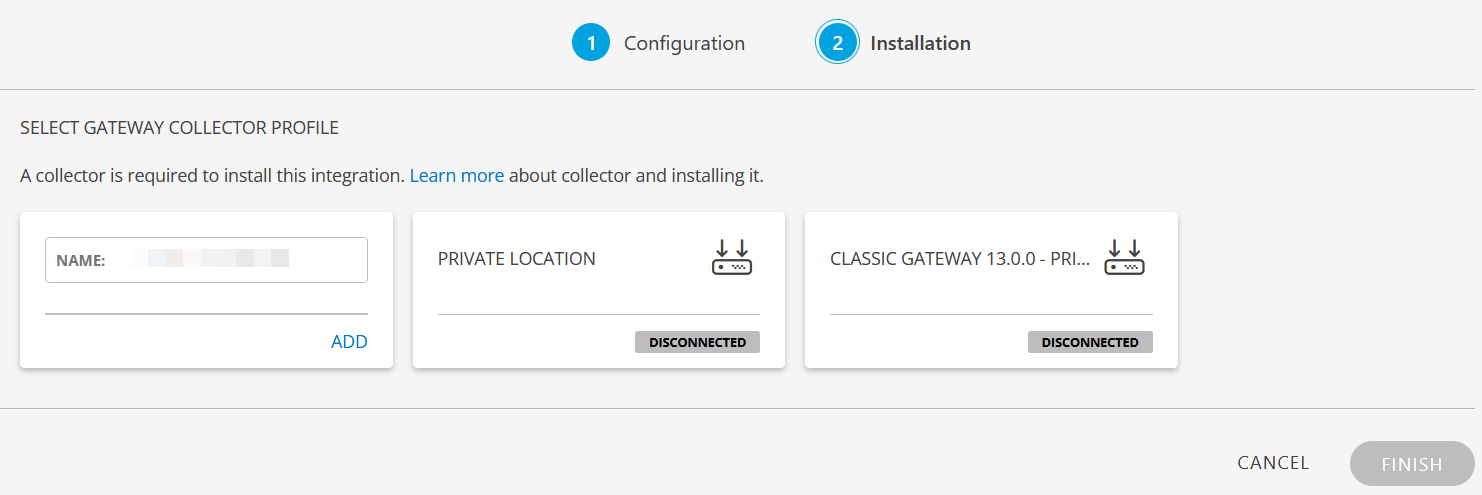
From the SELECT GATEWAY COLLECTOR PROFILE listing:
- Create a new collector by providing a new name or use the pre-populated name.
- Select a collector from the existing list.
Click Finish.
The integration or application is now installed and displayed on the Installed Integration page. Use the search field to find the installed application.
Modify an Installed Integration or App
See Modify an Installed Integration or Application article.
Note: Select the Linux OS - Agentless application.
Permissions Required and Commands Used
| Attribute | Command | Permission |
|---|---|---|
| KERNEL_NAME | uname | Root permission is not required. |
| SYSTEM_INFORMATION_ALL | uname -a | |
| LSB_RELEASE_ALL | lsb_release -a | |
| OS_NAME | /etc/os-release | grep PRETTY_NAME | |
| OS_VERSION | lsb_release -rs | |
| OS_DISTRIBUTION_ID | lsb_release -is | |
| CPU_INFORMATION_ALL | /proc/cpuinfo | grep -i 'processor\\|vendor_id\\|cpu family\\|model name\\|cpu MHz\\|cpu cores\\|power management' | |
| PROCESSOR_SPEED | lscpu | grep -i mhz | |
| PROCESSOR_TYPE | lscpu | grep -i 'model name' | |
| PROCESSOR_COUNT | lscpu | |
| PROCESSOR_WIDTH | lshw -C cpu | grep 'bus info\\|width' | |
| PROCESSOR_L2_CACHE_SIZE | /sys/devices/system/cpu/cpu | |
| WHOAMI | whoami | |
| HOST_ADDRESSES | domainname -i | |
| ALL_HOST_ADDRESSES | domainname -I | |
| DNS_DOMAIN_NAME | domainname -d | |
| LONG_HOST_NAME | domainname -f | |
| SHORT_HOST_NAME | domainname -s | |
| DNS_SERVERS | /etc/resolv.conf | |
| DEFAULT_GATEWAY_BY_ROUTE | route -n | |
| DEFAULT_GATEWAY_BY_IP | ip route show | |
| DEFAULT_GATEWAY_BY_NETSTAT | netstat -rn | |
| DEFAULT_GATEWAY_BY_IFCFG_FILE_PATH | /etc/sysconfig/network-scripts/ifcfg-eth0 | |
| DEFAULT_GATEWAY_BY_NETWORK_INTERFACES_FILE_PATH | /etc/network/interfaces | |
| MEM_INFO | grep MemTotal /proc/meminfo | |
| ASSET_TAG_FILE_PATH | /sys/class/dmi/id/chassis_asset_tag | |
| HOSTNAME | hostname -s | |
| HOSTNAME_WITH_DOMAIN_INFO | hostname -f | |
| DOMAIN_INFO | hostname -d | |
| NETWORK_INTERFACES_NAMES | /sys/class/net | |
| NETWORK_INTERFACE_STATUS | /sys/class/net/ | |
| NETWORK_INTERFACE_MACADDRESS | /sys/class/net/ | |
| NETWORK_INTERFACE_IPADDRESS | ip addr show | |
| RPM_SOFTWARE_INSTALLED_APPLICATIONS | rpm -qa --queryformat \"{'name' : '\"%{NAME}\"', 'architecture' : '\"%{ARCH}\"', 'version' : '\"%{VERSION}\"', 'release': '\"%{RELEASE}\"', 'installdate' : '\"%{INSTALLTIME:date}\"', 'size' : '\"%{SIZE}\"', 'vendor' : '\"%{VENDOR}\"','summary' : '\"%{SUMMARY}\"'\\},\\n\" | |
| DEBIAN_SOFTWARE_INSTALLED_APPLICATIONS | dpkg-query --show -f='{\"package\" : \"${Package}\", \"version\" : \"${Version}\", \"installedsize\" : \"${Installed-Size}\", \"comments\" : \"${Comments}\"},\\n' | |
| PHYSICAL_DISK_VENDOR_AND_MODEL | cat /sys/class/block/ | |
| PHYSICAL_DISK_PARTITIONS | cat /proc/partitions | grep ' | |
| PHYSICAL_DISK_MEDIA_TYPE_PATH1 | cat /sys/block/ | |
| PHYSICAL_DISK_MEDIA_TYPE_PATH2 | cat /proc/ide/ | |
| LOGICAL_DISK_DETAILS | cat /etc/mtab | grep /[sh][d][a-z] | |
| LOGICAL_DISK_SPACE_DETAILS | df -h | grep /[sh][d][a-z] | |
| BASE_BOARD_MANUFACTURER_FILE_PATH | /sys/class/dmi/id/board_vendor | |
| BASE_BOARD_PRODUCT_NAME_FILE_PATH | /sys/class/dmi/id/board_name | |
| SYSTEM_MANUFACTURER_FILE_PATH | /sys/class/dmi/id/sys_vendor | |
| SYSTEM_PRODUCT_NAME_FILE_PATH | /sys/class/dmi/id/product_name | |
| BIOS_VERSION_FILE_PATH | /sys/class/dmi/id/bios_version | |
| BIOS_RELEASE_DATE_FILE_PATH | /sys/class/dmi/id/bios_date | |
| BIOS_VENDOR_FILE_PATH | /sys/class/dmi/id/bios_vendor | |
| BASE_BOARD_SERIAL_NUMBER_FILE_PATH | /sys/class/dmi/id/board_serial | Root permission is required. |
| SYSTEM_SERIAL_NUMBER_FILE_PATH | /sys/class/dmi/id/chassis_serial | |
| SYSTEM_PRODUCT_UUID_FILE_PATH | /sys/class/dmi/id/product_uuid |
Use Case
Behavior of SSH discovery
Assume you have 40 resources that are divided as follows:
- For 10 resources, SSHD enabled with credentials 1
- For 5 resources, SSHD enabled with credentials 2
- For 25 resources, SSHD is not enabled
Scenario-1: Create a configuration with credentials 1
- If “Discover only SSH enabled devices” option enabled: Only the 10 resources of credentials 1 will get discovered with valid data (OS, Make, and Model).
- If “Discover only SSH enabled devices” option disabled: 10 resources of credentials 1 will get discovered with valid data (OS, Make, and Model) and 25 resources for which SSHD not enabled will get discovered with resource type as Other.
Scenario-2: Create a configuration with credentials 2
- If “Discover only SSH enabled devices” option enabled: Only the 5 resources of credentials 2 will get discovered with valid data (OS, Make, and Model).
- If “Discover only SSH enabled devices” option disabled: 5 resources of credentials 2 will get discovered with valid data (OS, Make, and Model) and 25 resources for which SSHD not enabled will get discovered with resource type as Other.
Scenario-3: Create a configuration with credentials 3 (invalid credentials)
- If “Discover only SSH enabled devices” option enabled: No resource will be discovered.
- If “Discover only SSH enabled devices” option disabled: All 40 resources will get discovered with resource type as Other.