Introduction
Smart, innovative, tailor-made interactive solutions that provide tools needed to facilitate enhanced outcomes from collaborative working.
Single large format solutions, interactive video walls, and scalable multi projector solutions support instant video conferencing, creative applications, interactive lectures and meeting plus infotainment systems.
Prerequisite
The OpsRamp Gateway must be installed.
Configure and install the integration
- Go to Setup > Integrations and Apps.
- Click + ADD on the INSTALLED APP page. The ADD APP page displays all the available applications along with the newly created application with the version.
Notes:- If there are already installed applications, it will redirect to the INSTALLED APPS page, where all the installed applications are displayed.
- If there are no installed applications, it will navigate to the ADD APP page.
- You can even search for the application using the search option available. Also you can use the All Categories option to search.
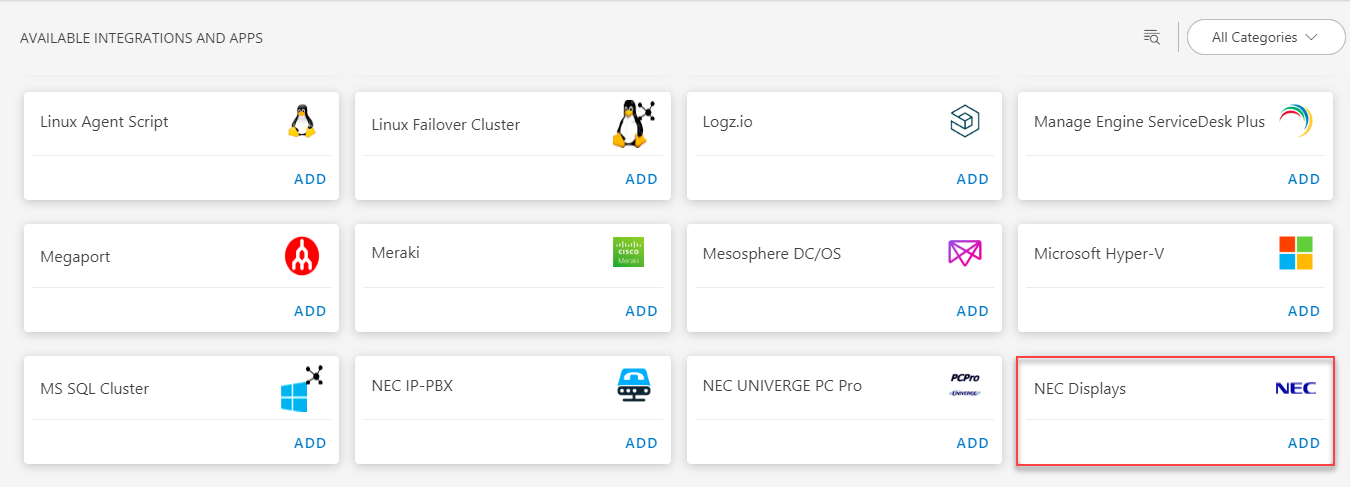
- Click ADD in the NEC Displays application.
- In the Configurations page, click + ADD. The Add Configuration page appears.
- Enter the below mentioned BASIC INFORMATION:
| Functionality | Description |
|---|---|
| Name | Enter the name for the configuration. |
| Host Name / IP Address | Host Name/IP address of the target. |
| Port | Port Note: By default 161 is added. |
| SNMP Version | Select the SNMP Version from the drop down. Note: By default version2c is added. |
| Community String | Enter the community string information. |
Note: Select App Failure Notifications; if turned on, you will be notified in case of an application failure that is, Connectivity Exception, Authentication Exception.
In the RESOURCE TYPE section, select:
- ALL: All the existing and future resources will be discovered.
- SELECT: You can select one or multiple resources to be discovered.
In the DISCOVERY SCHEDULE section, select Recurrence Pattern to add one of the following patterns:
- Minutes
- Hourly
- Daily
- Weekly
- Monthly
Click ADD.
Now the configuration is saved and displayed on the configurations page after you save it.
Note: From the same page, you may Edit and Remove the created configuration.Click NEXT.
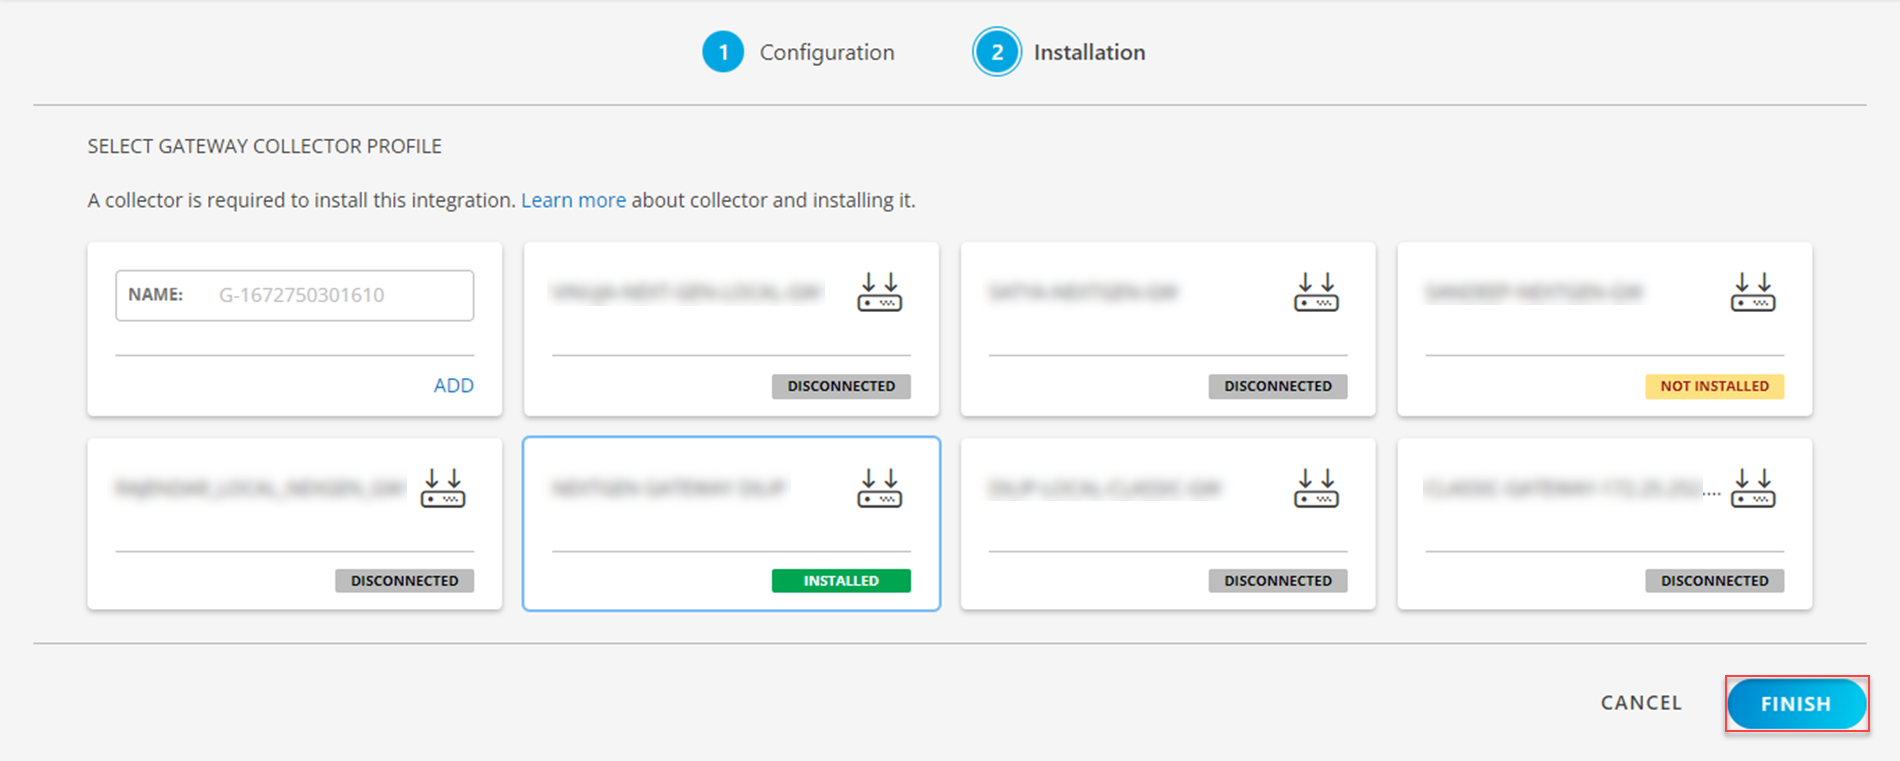
In the Installation page, select an existing registered gateway profile, and click FINISH.
The application is now installed and displayed on the Installed Integration page. Use the search field to find the installed application.
Modify the Configuration
See Modify an Installed Integration or Application article.
Note: Select the NEC Displays application.
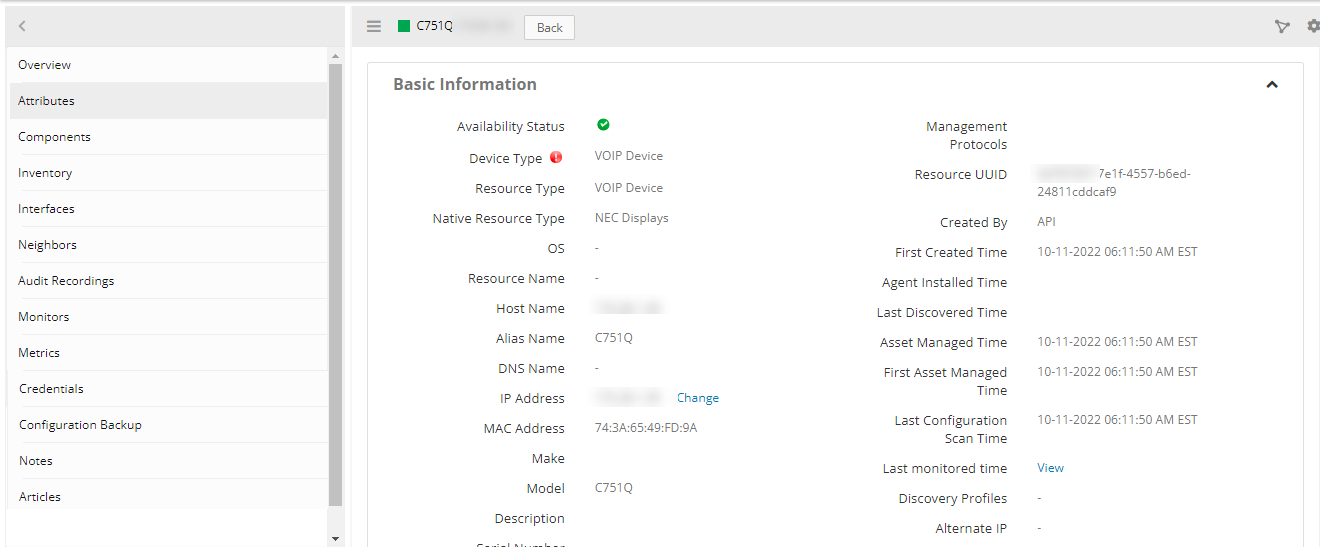
View the NEC display details
The NEC-display integration is displayed in the Infrastructure > Resources > Network Devices > VoIP. You can navigate to the Attributes tab to view the discovery details, and Metrics tab to view the metric details for NEC display devices.
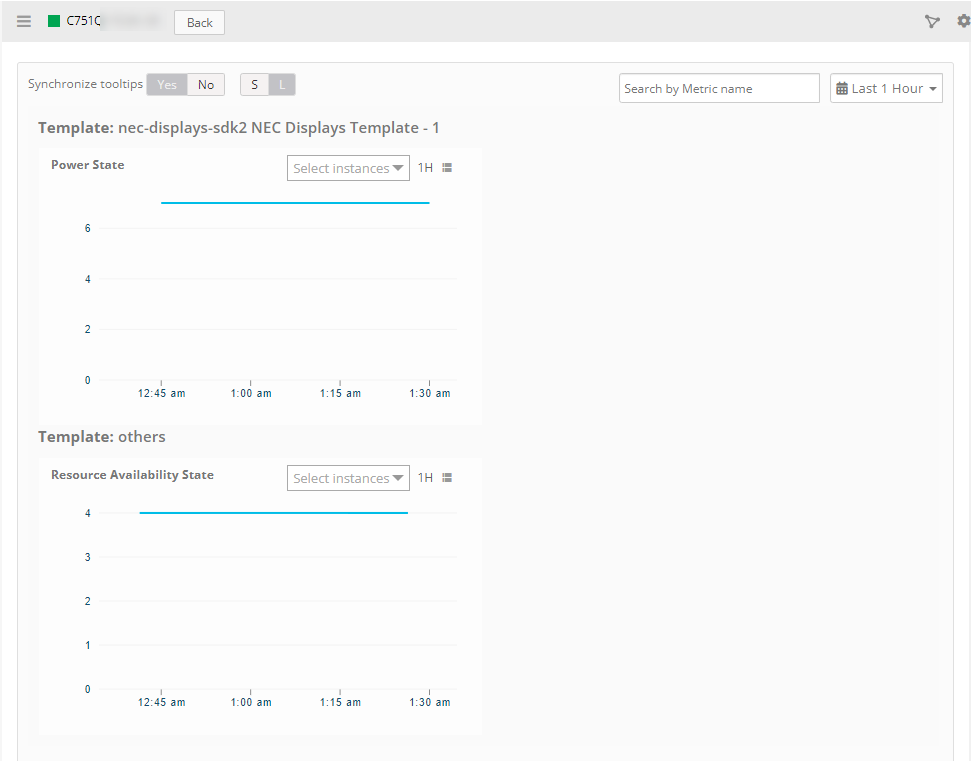
Supported Metrics
| Metric Names | Display Name | Unit | Description |
|---|---|---|---|
| nec_display_Power_State | Power State | Provides current power status of the device.Possible values \n1: \"Other\",\n2: \"Unknown\",\n6: \"Active Off\",\n7: \"Standby\",\n8: \"Power Saving\",\n9: \"Cooling\",\n10: \"Warming\",\n 11: \"On\" |
Risks, Limitations & Assumptions
- Application can handle Critical/Recovery failure notifications for below two cases when user enables App Failure Notifications in configuration:
- Connectivity Exception
- Authentication Exception
- Application will not send any duplicate/repeat failure alert notification until the already existed critical alert is recovered.
- Application cannot control monitoring pause/resume actions based on the above alerts.
- Metrics can be used to monitor NEC display resources and can generate alerts based on the threshold values.
- No support of showing activity log and applied time.
- No support for the option to get the latest snapshot metric.